MySQL Enterprise Service Agent を Mac OS X
にインストールするには、mysqlmonitoragent-
を解凍して、version-installer.app.zipmysqlenterpriseagent-
アプリケーションを実行します。
version-installer
-
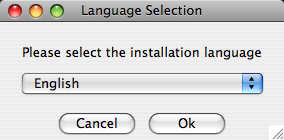
最初に、MySQL Enterprise Service Agent インストールの言語を選択します。「OK」をクリックしてインストールを続けます。
「次」をクリックして、インストールプロセスを開始します。
-
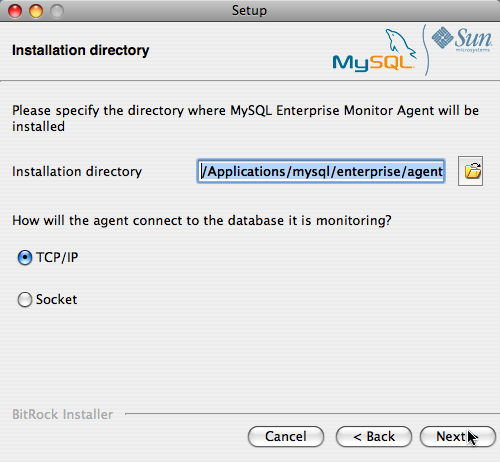
インストールディレクトリを選択します。デフォルトのインストールディレクトリは、
C:\Program Files\MySQL\Enterprise\Agentです。このインストールディレクトリを選択するか、新しいディレクトリを入力します。エージェントが MySQL サーバとの通信に使用する方法も選択する必要があります。TCP/IP(ネットワーク)接続を使用するか、Socket(ローカル)接続を使用するかを選択できます。接続方法を選択して、「次へ」をクリックします。
注意
The monitor agent always associates 「localhost」 with the TCP/IP address 127.0.0.1, not the MySQL socket. This is in contrast to the MySQL Command Line Tool, which connects via the MySQL socket by default on Unix, if the hostname 「localhost」 is specified.
If the MySQL server you wish to monitor has been started with the
--skip-networkingcommand option then you will not be able to connect to it via TCP/IP, as the server will not listen for TCP/IP connections. In this case the monitor agent will need to be configured to use the MySQL socket. This can be done during installation by selecting 「socket」 rather than 「TCP/IP」 and then specifying the MySQL socket name. This can also be configured after installation by editing theagent-instance.iniconfiguration file, for further information on this refer to 項2.3.6.2. 「MySQL Server(agent-instance.ini)の設定」.If the MySQL server to be monitored has been started using the command option
--bind-addressthen the server will only listen for connections on the IP address specified, that is, the IP address of the MySQL server. If the monitor agent has been started using TCP/IP networking and the default address of 127.0.0.1 it will not be able to connect to the server to be monitored. Also, if 「localhost」 is specified as the host name during agent configuration, a connection will not be established, as the server will be listening for connections on the address specified with the--bind-addressoption, not 127.0.0.1. -
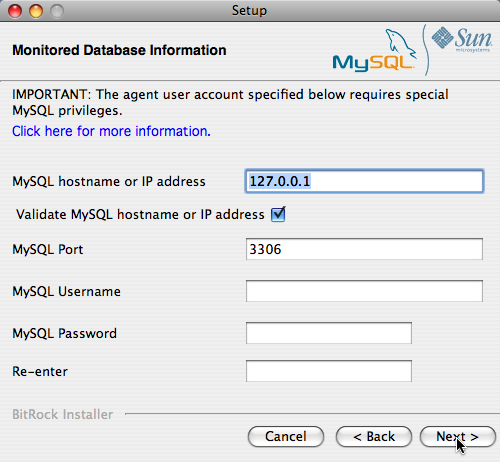
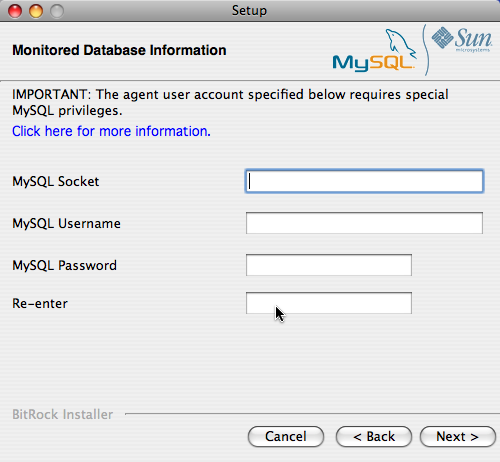
監視する MySQL サーバの情報を指定する必要があります。入力する設定情報は、直前の画面で選択した接続方法により異なります。
-
接続方法として TCP/IP を選択した場合、監視するホストの IP アドレスまたはホスト名、および MySQL サーバに接続するときに使用するポート、ユーザ名、パスワードを入力する必要があります。この情報を使用して MySQL サーバにアクセスできるか確認する場合、「MySQLホスト名またはIPアドレスを認証する」チェックボックスを選択してください。
-
接続方法として Socket を選択した場合、MySQL サーバにより作成された UNIX ソケットの完全なパス名、およびサーバの認証に使用されるユーザ名とパスワードを入力する必要があります。通常の値は、
/tmp/mysql.sockまたは/var/mysql/mysql.sockです。
「Next」をクリックして、インストールを続けます。
-
-
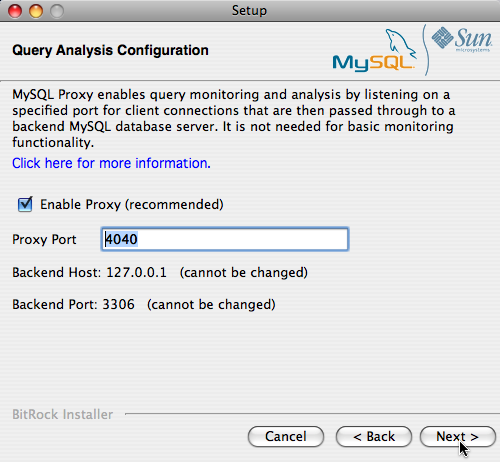
Query Analyzer を使用する場合、MySQL Enterprise Service Agent プロキシを有効にする必要があります。プロキシはデフォルトで有効になっています。インストール中にプロキシを無効にした場合に Query Analyzer を使用するには、プロキシを有効にする必要があります。Query Analyzer の詳細については、章 9. Query Analyzer ページを参照してください。
プロキシが有効にされている場合、MySQL Enterprise Service Agent はクライアントアプリケーションのネットワークポートでリスニングし、接続をバックエンド MySQL サーバに転送します。MySQL Enterprise Service Agent が接続をリスニングするポート番号を変更できます。デフォルトポートは 6446 です。
-
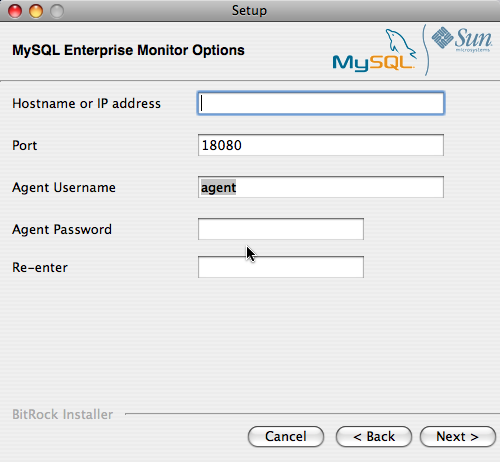
使用する MySQL Enterprise Service Manager は、インストール中に設定する必要があります。ホスト名、ポート、エージェント認証情報を入力する必要があります。MySQL Enterprise Service Manager をすでにインストールしている場合、インストール中に作成されるインストールレポートファイルでこの情報を確認できます。必要な情報を入力し、「次へ」をクリックして進みます。
インストール中に入力した情報を含む設定レポートが提供されます。このレポートに示されている情報を確認します。問題があれば、「戻る」を使用して設定画面に戻り、情報を変更します。情報が正しい場合、「次へ」をクリックして進みます。
この時点ではまだインストールパラメータを変更できます。「次へ」をクリックしてインストールプロセスを開始します。
エージェントがインストールされたら、確認メッセージが表示されます。「次へ」をクリックしてインストールを終了します。
MySQL Enterprise Service Agent を自動的に起動できれば、インストールは完了です。エージェントを起動できるようにするには、チェックボックスを選択したままにします。エージェントを個別に起動するには、チェックボックスの選択を解除します。「終了」をクリックして、インストールを終了します。
Monitor Agent がインストールされたら、これを起動する必要があります。Service Agent の起動および停止の詳細については、項2.3.5.2. 「Agent の起動/停止: Mac OS X」を参照してください。

